Qt Creator for Fortran
Qt Creator is a integrated development environment, IDE, for C++ and Qt, but can be easily adapted as a development environment for Fortran using plugins provided together with this book.
The user interface of Qt Creator resembles the one found in commercial alternatives such as Microsoft Visual Studio or Intel Visual Fortran. This chapter gives a short introduction on how to get started with this development enviroment.
To be able to use the Fortran Project templates and compile Fortran code in Qt Creator, require the following pre-requisites:
A working Fortran compiler available in the search path. On Windows this is best achieved by installing the MinGW packages when installing Qt Creator. On Mac OS X the gfortran compiler is available in the MacPorts or Brew distributions.
CMake installed and available as a command line tools. On Windows CMake can be installed when installing the Qt Creator environment. On Max OS X these tools are provided withe the MacPorts and Brew distributions.
Fortran Templates for Qt Creator which can be downloaded here. These templates work for all platforms.
Starting Qt Creator
Starting Qt Creator can be done from the Start-menu on Windows and from the application launcher on Mac OS X. When Qt Creator has been launched the main windows is shown in Fig. 6.

Fig. 6 Qt Creator main window
On the left side of the window, 2 toolbars are shown. The top toolbar controls the main program modes of Qt Creator. The lower toolbar is the project build toolbar, which controls how the projects are built and run.
Qt Creator main program modes
There are 7 program modes in Qt Creator, controlling the workflow of the development environment. The different modes are listed below:
Welcome mode - Shows a welcome screen, providing shortcuts for many of the common operations of the development environment.
Edit mode - This is probarbly the most used mode of the development environment. This mode provides access to the files within a project as well as an source code editor supporting most languages.
Design mode - In this mode user interfaces for Qt can be designed. This mode will not be used for Fortran development.
Debug mode - This mode will be activated when the application is run in debug mode, for interactive debugging your Fortran application.
Project mode - This mode provides access to settings that applies to the current project.
Analyse mode - Provides access to profiling tools. This mode will not be used in this book.
Help mode - Provides access to the online documenation provided by the development environment.
Switching between modes are in many cases done automatically. Debugging an application will automatically switch to debug mode. Creating or opening a project will automatically switch to edit mode.
Installing Fortran support in Qt Creator
As Qt Creator is not used by default for Fortran development, additional support for Fortran must be added to Qt Creator. We will use the templates and highlighting from the qtcreator-fortran project.
Installing project and highlighting templates
Detailed instructions on how to install the Qt Creator extensions are available here:
https://github.com/jonaslindemann/qtcreator-fortran
A video on how to install the extensions is also available on YouTube.
Creating a Fortran project
To use Qt Creator as a development environment for Fortran, a project has to be created. A project defines, which files that are required for building the program as well as any required settings. By default Qt Creator uses its own custom project format, but can also handle CMake based project, which is also what the installed Fortran plugins use.
To create a new project, select File/New file or project…* from the menu. This brings up the project/file creation window as shown in Fig. 7.
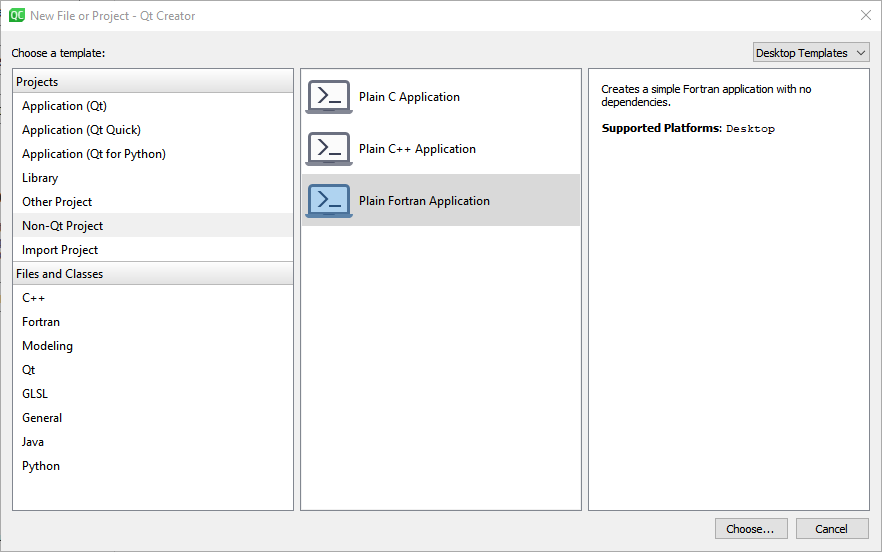
Fig. 7 Qt Creator new project/file selection window.
Next, select Non-Qt Project and select the Plain Fortran application and click the Choose… Button as shown in Fig. 8.
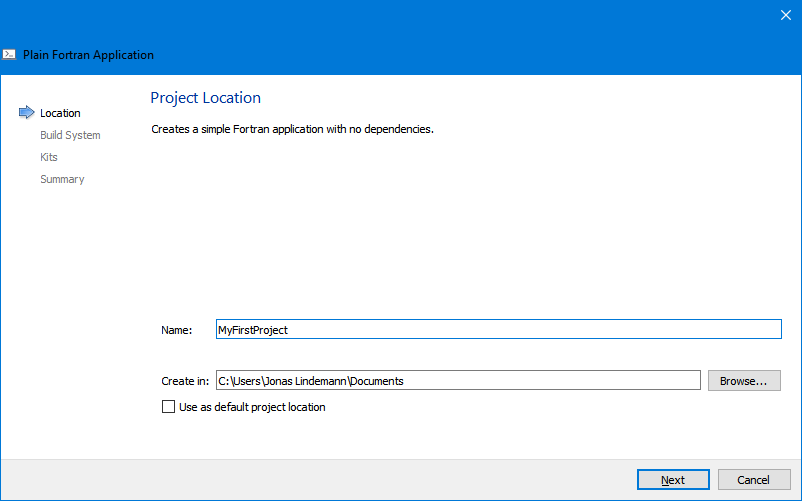
Fig. 8 Choosing a project name.
Enter a name and directory for your Fortran application and click Next. Next select the build system, CMake, in the next step shown in Fig. 9.

Fig. 9 Select build system.
Click Next to continue. In the next step we need to select which compiler toolchain to use. In Qt Creator a toolchain is called a kit. Select one of the presented kits as shown in Fig. 10.
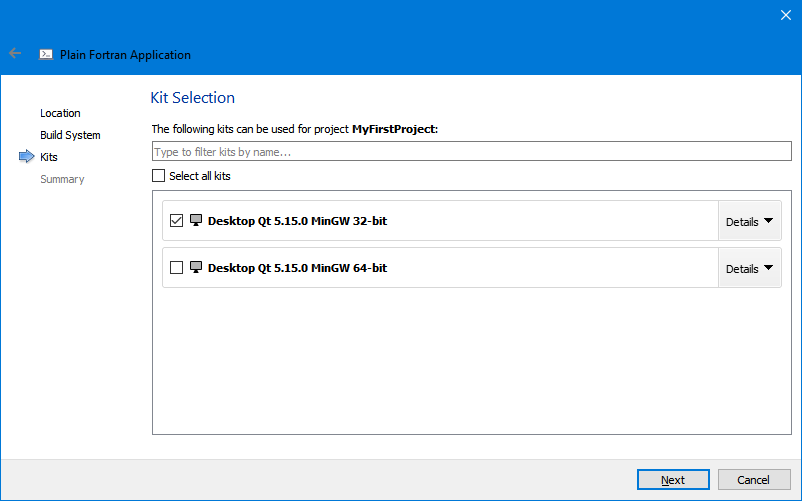
Fig. 10 Select compiler toolchain (Kit).
Click Next to continue. In the next step a versioning system can be selected, but this can be skipped, see Fig. 11.
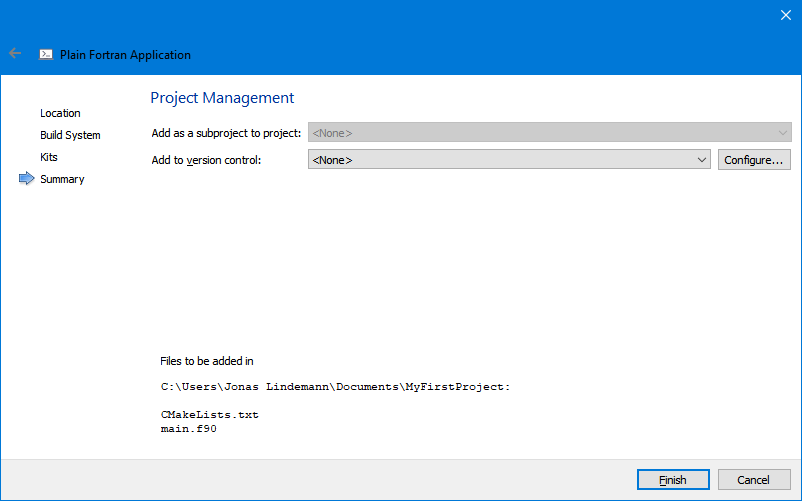
Fig. 11 Select version control system.
Click Finish to finish the project creation. If all worked a new CMake Fortran project should have been created as shown in Fig. 12
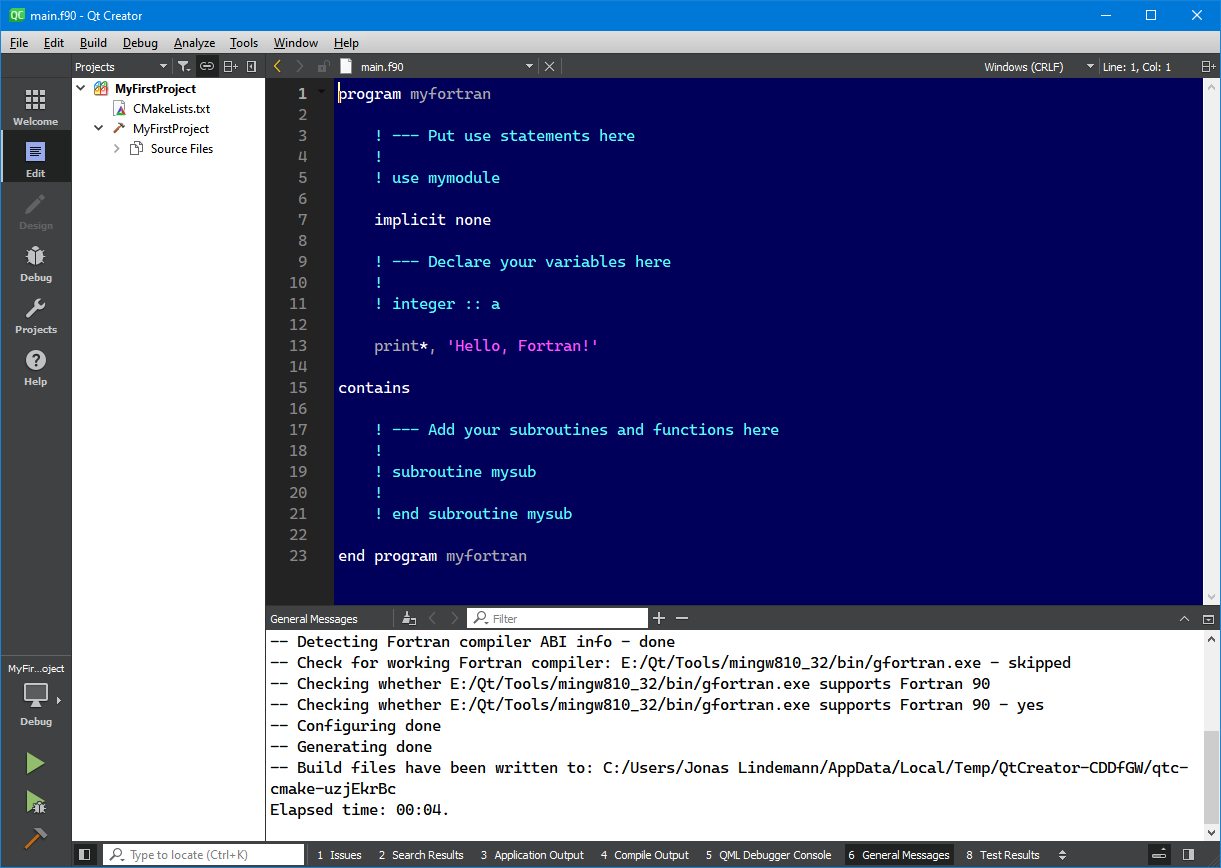
Fig. 12 New Fortran project created.
Building the project
Building the project is done either by selecting Build/Build [Project name] from the menu or using the build button in the bottom left of the window as shown in Fig. 13.

Fig. 13 Building a Fortran application.
The results of the build process is shown in the Compile output pane as shown in Fig. 14.
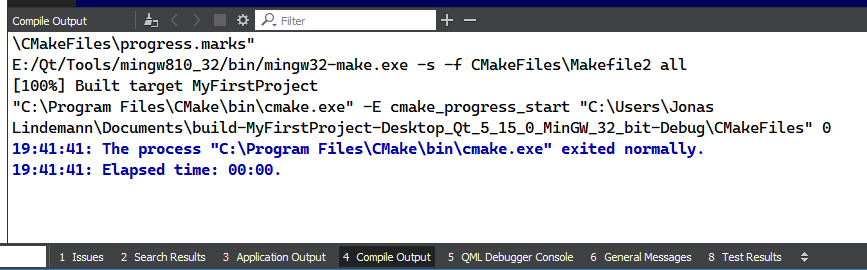
Fig. 14 Output from application compilation.
Errors during the build will also be shown in the Compile output pane. An example of this is shown in Fig. 15.
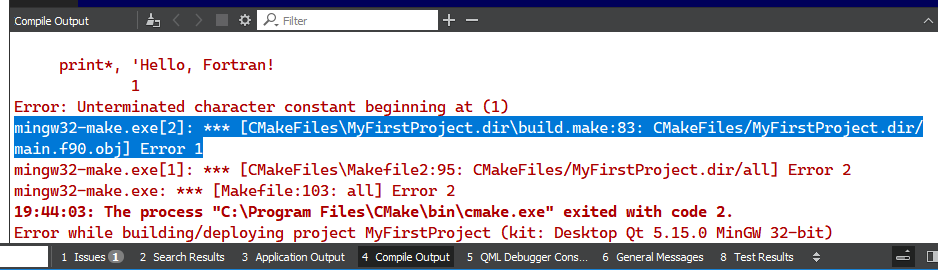
Fig. 15 Compilation error.
Running the project
Running the finished application can be done by selecting . This will run the first target in the project. If the CMakeLists.txt file contains more targets (add_executable), the selected executable to run can be selected by clicking on the ”Terminal” icon in the lower left toolbar. This brings up a menu in which you can select the target to run as shown in the following figure: